Welcome back to my weekly product feature. I've recently moved so have been super busy with that. I've been unpacking and putting away like crazy! There are 2 products this week, sort of. Please read on.
The Big 8
August is finally here! The stores are putting out school supplies and kids will soon be going back to school.
When I was growing up, this was the time of year when we would get new crayons as part of our school supplies. Do you remember how pretty and perfect they looked all lined up in their new box, a box that wasn't torn or ripped when finally you were able to open them? Can you smell them?
If you are like me you also love Stampin' Up's! color collections: the gorgeous hues, the coordination, and let’s not forget the clever names. But what about the basic eight? You know, just plain-old red, orange, yellow, green, blue, purple, black, and brown? Well, guess what? They are ready for you today.
While they’re not all in one collection, you’ll still find the color standbys—the basic 8.
So here we (re)present, the basic eight.
Real Red
Pumpkin Pie
Daffodil Delight
Garden Green
Pacific Point
Elegant Eggplant
Basic Black
Chocolate Chip
The ones you’ve been using since you opened up your first coloring book. They’re just scattered throughout the Stampin’ Up! color collections (sometimes disguised by their fancy names). To test this point, Stampin Up recently went to a store and picked up a basic box of eight crayons, then compared the hues with ours to find these matches.
Pretty simple! So here I (re)present the basic eight.
Real Red
Pumpkin Pie
Daffodil Delight
Garden Green
Pacific Point
Elegant Eggplant
Basic Black
Chocolate Chip
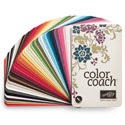
Color Coach
Meet the Color Coach. You can use it to access loads of color combinations using our basic colors. This tool teaches you the possibilities for communicating with color, how to combine colors, and how to substitute colors. There are at least two color combinations provided for every Stampin’ Up! color (In Color cards sold separately).
Check out the creative combinations for each of these basic colors from the Color Coach:
REAL RED: Bashful Blue and Crumb Cake
PUMPKIN PIE: Pacific Point and Real Red
DAFFODIL DELIGHT: Cherry Cobbler and Early Espresso
GARDEN GREEN: Chocolate Chip and More Mustard
PACIFIC POINT: Melon Mambo and Pumpkin Pie
ELEGANT EGGPLANT: Garden Green and More Mustard
BASIC BLACK: Baja Breeze and Cherry Cobbler
CHOCOLATE CHIP: Pretty in Pink and Wild Wasabi
I love the versatility of Stampin’ Up!
colors. They’re fresh and trendy, but you can still find the basic colors of the rainbow in the different collections.
Our colors come in tones specifically designed to work together and to be on trend. It makes them so easy to use.
Let this coach help you put together custom color schemes to express your unique creativity. Whether you want a quick reference of all colors in a collection, a card for every color, or blank cards to record your own color combinations, this swatch book Is for you!
■ Includes 55 double-sided cards with removable metal post fastener
■ Includes color theory cards and individual color swatch cards
■ On individual color cards, one side shows color, the other side lists coordinating colors
■ Card size: 2-3/4" x 4-1/2"
Here's a fun card using Real Red, Pumpkin Pie, Daffodil Delight, Pacific Point and Rich Razzleberry. The stamp set Bright Blossoms is perfect for a Summertime card.