Monday, December 7, 2015

Beautiful Ornament


Good Morning!  We recently took a survey at the gym to see when we start listening to Christmas music - I said Dec. 24.  I am happy to report that I have started earlier than I expected.  I have been working on a new card design and style for me, it is slowly coming together but having to wait for supplies to arrive.  Ugh.  I am only going to make 8 or 9 as there are so many pieces in 1 card! The majority of my cards will be made using the Wonderland Suite.   As you know, I love these colors and designs.  And of course, each card is made with love.

Blessings to each of you.
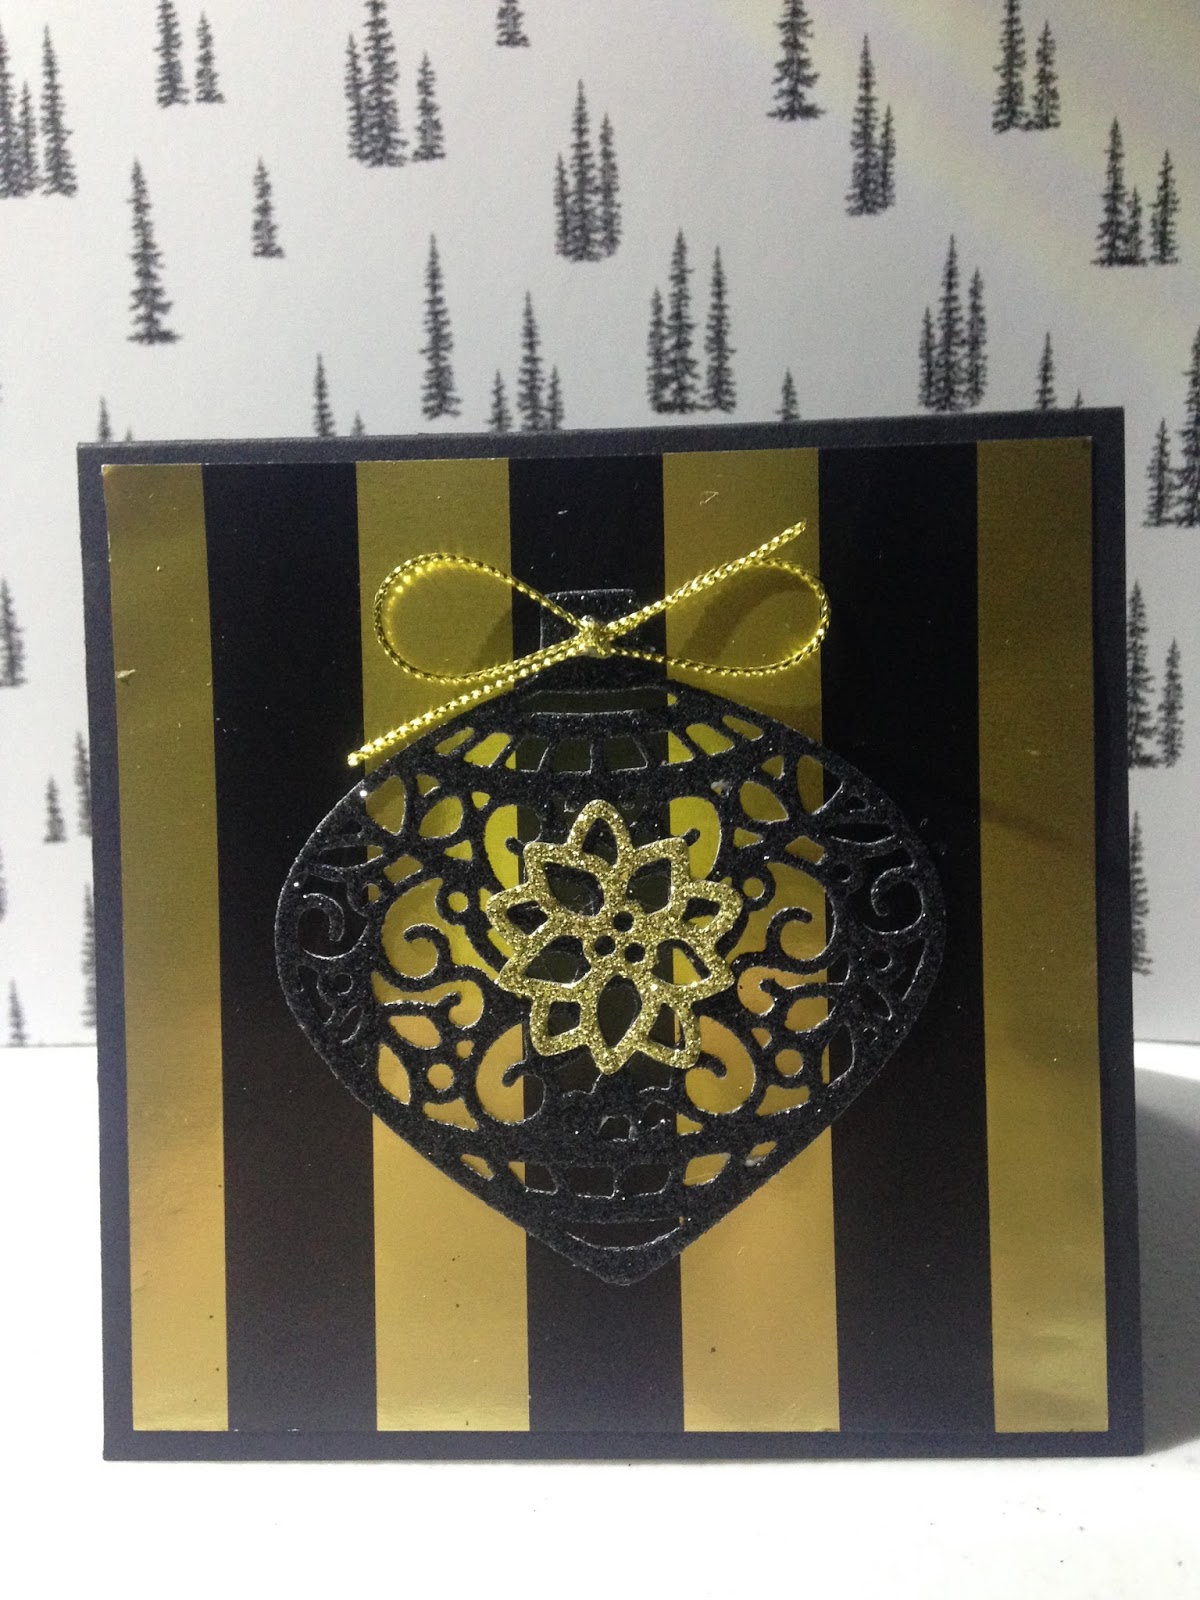

Recipe:

Cardstock - Basic Black
DSP - Winter Wonderland Specialty
Pretty Accessories - Black Glimmer Paper, Gold Glimmer Paper, Gold Cord 
Cool Tools - Big Shot, Delicate Ornament Thinlits Dies, Precision Base, Fine Tip Glue Pen

Wednesday, December 2, 2015

Wonderland


The new Winter Wonderland Specialty Designer Series Paper by Stampin' Up! features the colors Basic Black, gold, and Whisper White and when I saw it I knew my Christmas cards this year would feature this beautiful paper.  When I actually got it into my hands - oh my.  It was as close to Heaven as I could get.  Seriously.


Recipe:
Cardstock - Basic Black, Whisper White
DSP - Winter Wonderland Designer Vellum Stack
Stamps - Wonderland
Ink - Versamark
Pretty Accessories - Gold Foil Sheets
Cool Tools - Big Shot, Delicate Ornament Thinlits Dies, Heat Gun, Whisper White Embossing Powder 


Joy

Hi everyone.  The sun is shining!  I have a great day ahead of me, my workout and dinner & Advent Services tonight with my church family.

We enjoyed making this pretty card in my recent class, so here's the scoop on it.  I'm not a big poinsettia fan, but the colors in this paper design are so pretty.  I started with a small piece and then built my card around it.  This Designer Series Paper, aka DSP, is called Home for The Holidays and that made me love this paper even more.  One of our new products in our holiday catalog was the beautiful Red Foil Sheets of paper that I used to die cut the word Joy from.  Christmas music is such an integral part of this joyful season, it was perfect for my Joy card!


Recipe:  
Cardstock - Very Vanilla, Real Red
DSP - Home for The Holidays
Ink - Encore Metallic Gold
Pretty Accessories - Red Foil Sheets, Home for Christmas Enamel Dots, Snowflake Elements, Winter Wonderland Designer Washi Tape, Linen Thread 
Cool Tools - Big Shot, Wonderful Wreath Framelits Dies


Tuesday, December 1, 2015

Poinsettia


This card is from my recent Christmas Card Making Class.  


Recipe:
Cardstock - Real Red, Garden Green, Crushed Curry, Whisper White Thick
DSP - Home for Christmas 
Ink - Real Red
Stamps - Reason for the Season
Pretty Accessories - Gold Sequin Trip, Gold Metallic Thread
Cool Tools - Festive Flower Builder Punch, Garden Green Stampin' Wire Marker, Curvy Corner Trio Punch

Thanks

I have quite a few new projects to share, so here we go.

I found a similar design on Pinterest and loved it so set out to make one for myself.  This was before Halloween and I wanted to use my new paper to make a card but not a Halloween card.  I loved how it turned out!  Oops, it looks like I forgot to adorn one of the flowers with a rhinestone.

The stamp set I used is Stippled Blossoms.  This set has a few 2-step stamps, meaning that you have 2 images to create one flower allowing you to stamp with 2 different colors of ink giving your flowers more color and depth and more interest.

In this case, I only wanted to use one of the images and then I heat embossed it.  To make the flower my focus I surrounded it with little flowers and embellished them with rhinestones, added pretty ribbon and added one of our wood veneer words.

Thanks so much for stopping by.  Feel free to leave a comment.

Blessings.


Recipe:
Cardstock - Very Vanilla, Tangelo Twist, Crushed Curry, Basic Black
DSP - Happy Haunting 
Stamps - Stippled Blossoms
Ink - Versamark
Pretty Accessories - Tea Lace Doilies, Expressions Natural Elements, Rhinestone Basic Jewels, 3/8" Stitched Satin Ribbon Tangelo Twist
Cool Tools - Crushed Curry Embossing Powder, Heat Gun, Itty Bitty Accents Punch Pack

Tuesday, November 10, 2015

Wonderland

Good morning everyone.  I hope your week is going well.  I have a busy day planned for which, once completed, I will feel much better.   First off is an appointment with my Pastor.  I have some things going on that I am not handling well and I always feel better afterward because I have a plan to help me move forward.

Tonight is scrapbooking night at my place and I am looking forward to seeing everyone.  But, before that can happen, I need to do some housecleaning.  It will be nice to have accomplished some things that are on my never-ending to do list!

As sometimes happens, the card I had planned isn't what it became but that's okay.  So I changed my design up a bit and am thrilled with the result!  I hope you enjoy it.

Thanks so much for stopping by.  I would love to hear your thoughts, please leave a comment.


Recipe:
Cardstock - Basic Black, Whisper White
DSP - Winter Wonderland, Winter Wonderland Specialty, Fancy Foil Designer Vellum
Stamps - Wonderland
Ink - Versamark
Pretty Accessories - Whisper White Embossing Powder
Cool Tools - Big Shot, Precision Plate, Delicate Ornaments Thinlits, Heat Tool

Tuesday, November 3, 2015

Everyday Chic

Good morning.  I love that Michael's often has weekly 40% off coupons, but it's even better when they have 50% off coupons!!!  I have fallen in love with a new art medium called Mixed Media - I hope to show you mine soon.  One of the products needed is lots of paper flowers. Friday, I found a large container of white paper flowers at Michael's so I went back Saturday night to get them and used my coupon!  I want to color and embellish them instead of buying them. I'll try to show those along the way, too.  I couldn't wait to play with them so I sat down to create a card and here it is.  


Recipe:
Cardstock - Basic Black
DSP - Everyday Chic
Pretty Accessories - Tea Lace Paper Doilies, Antique Brads, Washi Tape 
Cool Tools - Big Shot, Lots of Labels Framelits Dies, 2-1/2" Circle Punch

Monday, November 2, 2015

Boo Boo

Hi everyone.  I haven't been very creative lately so decided to try some sketch challenges to get me going  I wanted to do something outside the box and I happened to have the Boo To You Framelit Dies sitting on my desk so I picked it up and started to look at the Boo image.  Then boo boo came into my head, then I thought of Honey Boo Boo, I tabled that (you're very welcome) & came up with I hear you have a boo boo!  Amazing what happens when you just listen!


CCMC379

Recipe:
Cardstock - Mossy Green, Delightful Dijon, Soft Suede, Whisper White
Ink - Tangerine Tango, Versamark
Stamps - Howl-o-ween Treat, Rotary
DSP - Into The Woods
Pretty Accessories - Candy Dots Neutrals
Cool Tools - Big Shot, Boo To You Framelit Dies, 1-3/4" Circle Punch


Monday, October 5, 2015

Succulents

Hello.  It is cool and cloudy here.  A nice day to be home and getting some things done.  I'll be going to the gym later and I need to drop off a package at the Post Office.  I tried a new recipe yesterday for Ham & Cheese Sliders.  They were pretty good but I think my next hot ham & cheese sandwich will be done in a nonstick skillet.  Here's the recipe:

Ingredients
3/4 cup melted Butter
1 tbsp Dijon Mustard
1 tsp Worcestershire Sauce
1 tsp Brown Sugar
1 tbsp Poppy Seeds
2 tsp Dried Minced Onion
12 King's Hawaiian Dinner Rolls
9 oz thin sliced Deli Ham
8 oz thin sliced Swiss Cheese

Instructions
Preheat oven to 350.
Grease a 9x13inch
baking dish.
Combine butter, mustard, Worcestershire sauce, brown sugar, poppy seeds, and dried onion.
Slice the rolls to make sandwiches. Remove tops and set aside.
Place the bottom pieces into the prepared baking dish.
Layer the ham onto the rolls.
Top the ham with the Swiss cheese.
Place the tops of the rolls onto the sandwiches.
Brush or pour the liquid mixture evenly over the rolls.
Bake 20 minutes or until the rolls are lightly browned and cheese has melted.
Separate into individual sandwiches to serve.


My project today are these cute succulent plants made out of cardstock.

Have a great week!  Thanks so much for stopping by.  Please feel free to leave me a comment, I love hearing from you.